In this Studio Portrait Lighting Tutorial, I am going to be talking about my favourite method of creating an effective fill light. If you have ever been scratching your head in the studio, wondering how to brighten up the shadow areas of your image without drastically changing the look of your lighting, then read on.
WHAT IS FILL LIGHT?
Fill light is an extra light added to a scene that is used to reduce contrast and brighten up the shadows. Basically, it's used to retain detail in the darker areas of an image.
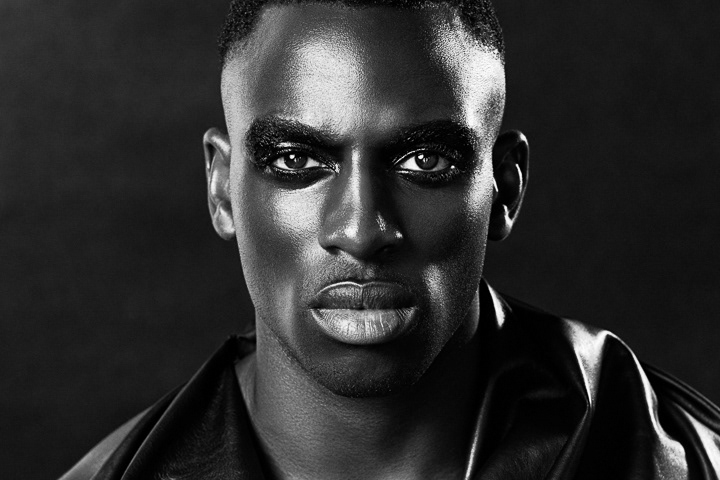
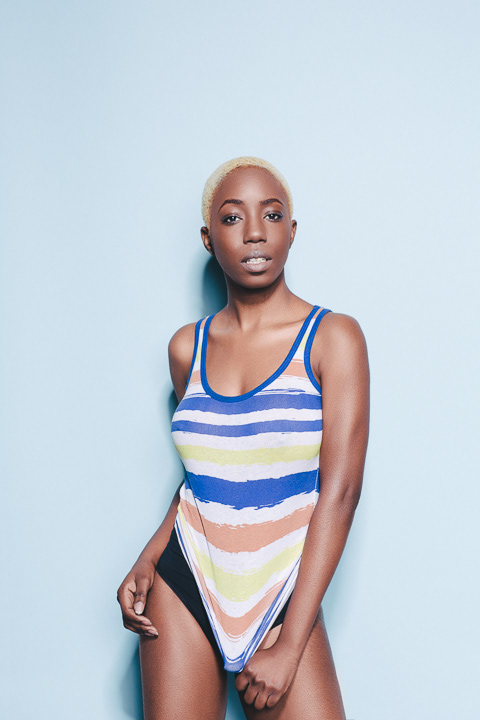
In my example image below, you can see that the right side of the model's face is in shadow, but there is still plenty of detail there. For the most part, the darker areas of the image have been prevented from fading out to pure black (at which point all detail in these areas would be lost forever).
MY FILL LIGHT TECHNIQUE
There are many ways of creating a fill light, but this method is by far my favourite when in the studio. It's also really easy, and all you need is a big white surface/wall behind you.
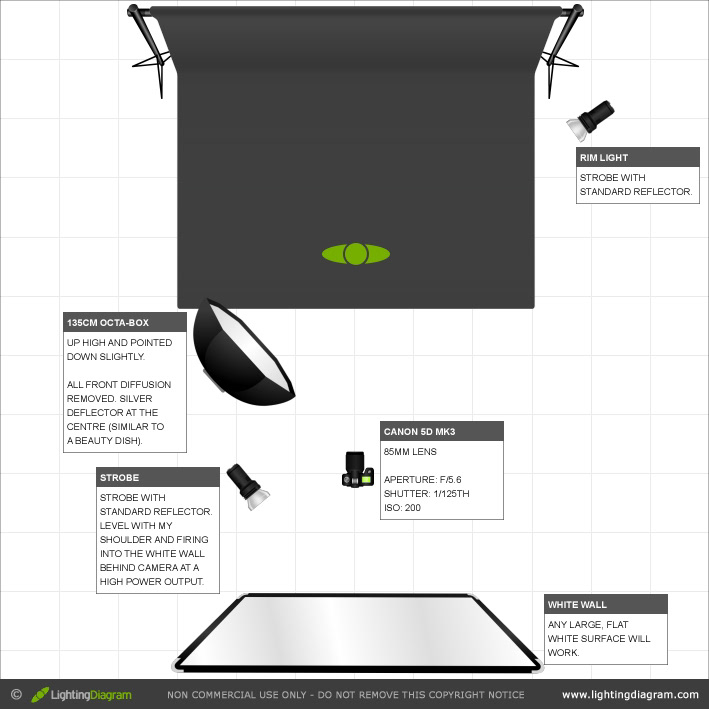
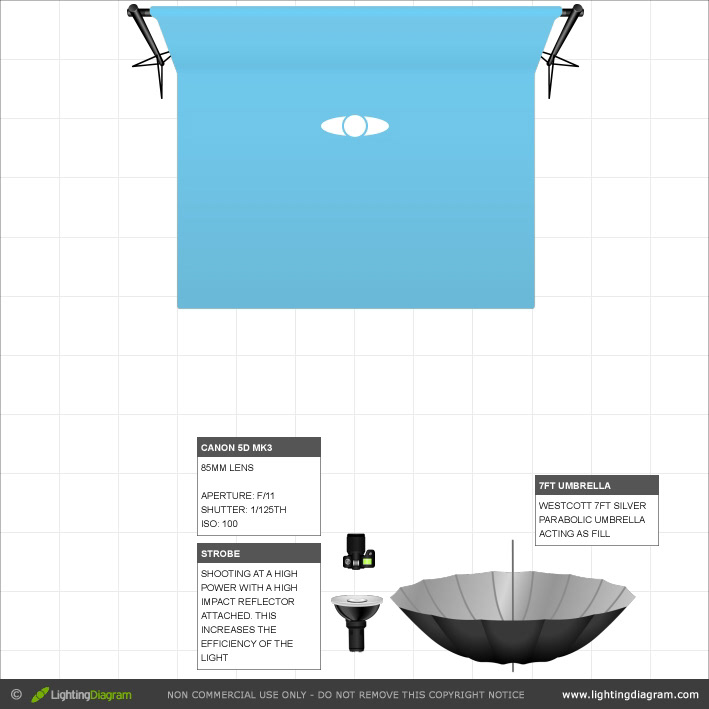
Take a look at the image above and the lighting diagram below. Imagine that we've set up our main light (the octa-box) and our rim light behind the model. We're happy with how the light looks, but the image is a little dark with shadow areas turning to pure black. This is exactly the situation I found myself in while shooting this image recently.
We could add another light to the camera right side of the model to help control the shadows, but that would just mess with the nice shadow/highlight pattern we have set up on the face already. We need more light, but it needs to be directionless for the most part.
The solution? In my studio, I have two huge white v-flat reflectors that are about 8 feet high and 4 feet wide on each side of the hinge. I opened one of the v-flats up all the way and rested it on the wall behind my back. I now had 8 feet x 8 feet square of pure white behind me.
Next, I took another strobe. Placed it next to myself at the spot I was going to be shooting from, raised it up to about shoulder height and pointed it at the makeshift white wall behind me. I took a couple of test shots and ended up dialling the power on my 400ws strobe pretty much all the way up to get the look I wanted.
So, what is actually happening here? Well, the extra strobe is firing into the white wall behind me which illuminates the whole surface and throws all that light back to the subject. Essentially turning it into a huge softbox. This is why the fill light strobe is firing at significantly more power than the other lights. It has to shoot behind me, get absorbed by the wall, and then shoot forward again to illuminate the model.
You may also be wondering about how my entire body being stood in front of the white wall of light doesn't cast a shadow.
Well, when a light source gets that big in relation to the subject, it kinda becomes directionless. In this case, there is so much light that it just wraps around me and continues on its way to the model. For those brief few milliseconds that the flash is actually firing, the fill light is pretty much everywhere. You could think of it as being similar to that old favourite speedlite technique, the ceiling bounce, only better!
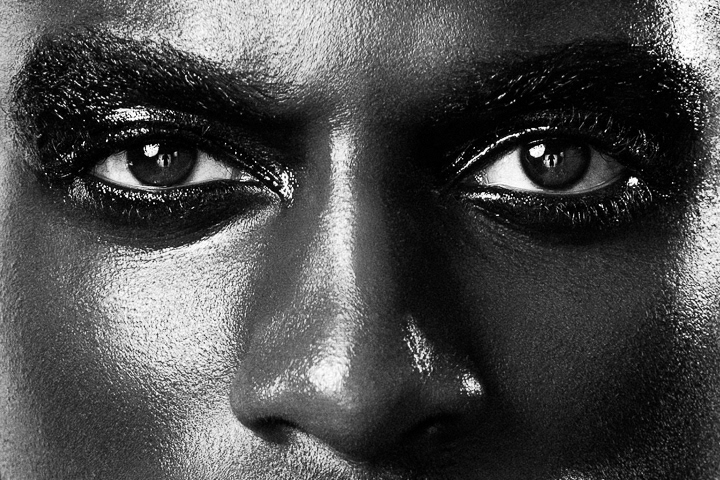
If you study the reflection in the eyes below, you can see my silhouette stood in the middle of the illuminated white wall.
ANOTHER OPTION
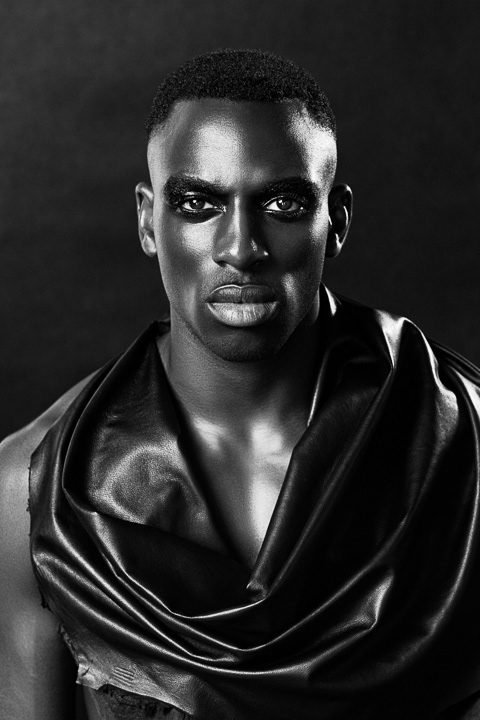
So, what if you just don't have a big white wall or anything that could act as a white wall in a pinch? Well, in the past I've used an umbrella to get pretty much the same effect. Of course, the bigger the umbrella the better. I use a Westcott 7ft. Silver Parabolic umbrella when the need arises. Just like in the image below.
In this example, I was using a high impact reflector on my main light. This is a great modifier for getting that sharp, high contrast, hard light look, but the further you back it off the narrower the beam of light hitting your subject will become. In this case, the result is the lower half of the model's body is a bit darker than the top. To counteract this and even things out a bit, I set up the big 7ft umbrella behind my right shoulder and fired it straight ahead. Again, the fill light power here was quite high, as the umbrella is a less efficient modifier than the reflector on the main light, so it has to work a bit harder.
Umbrellas are not a very directional light source, to begin with, and the fact that this umbrella is huge means that the light is just thrown all over the place, just like our big white wall from earlier.
You should have everything you need to get started with creating a great looking fill light of your own now. If you have any comments or questions about fill light or anything else photography related, just email me via the Contact Page.
Cheers,
B.
B.