In this portrait photography tutorial, I will share my quick and dirty, step by step guide for mixing flash and ambient light in order to get a more even/natural looking exposure.
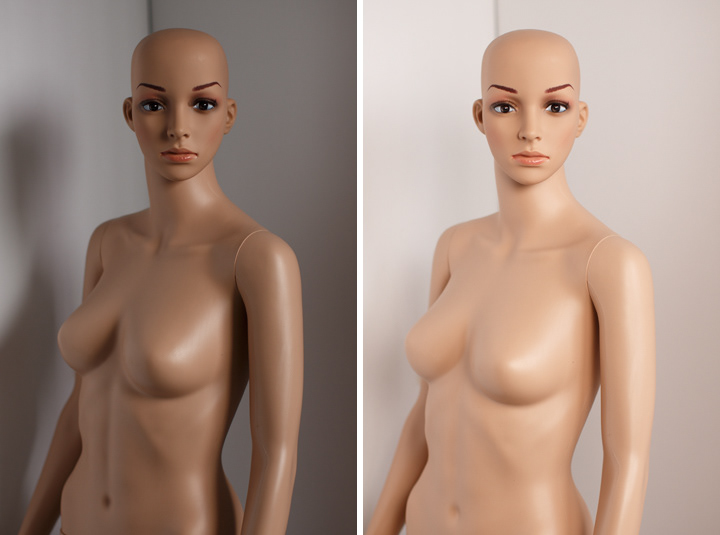
I love shooting in soft, natural light. Whether it be outdoors on an overcast day, or in the studio using window light. The problem is that sometimes it can be a little too overcast (at least here in Ireland), resulting in dull looking images (like the image on the left above). But thankfully, there are ways of getting great natural looking light even on the dullest of days. In fact, it is a subject I have discussed on this very blog not so long ago. If you've read and understood my Fill Light Tutorial, you should have no problem with this technique. It's the exact same concept, but this time we will be filling in the shadows created by natural light, and not other strobes.
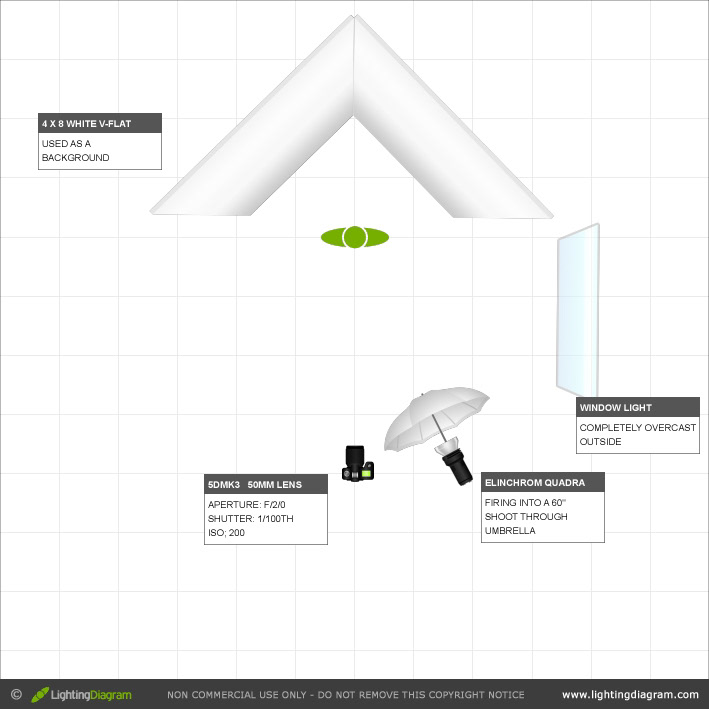
Anyways, let's get to it. As you can probably tell from the two images above, the one on the left was shot with just straight natural window light coming from camera right. It was a very dull day outside. The image on the right was shot using the setup in the diagram below. There is no difference whatsoever in how I shot these images, except for the fact that I turned my flash on for the image on the right. Much better don't you think?
Ok, here's how I did it:
STEP 1
Choose the aperture you want to shoot at and get your ambient exposure. In this case I wanted to shoot at f/2.0. I spot metered with my camera off of the mannequins cheek and adjusted my shutter speed until the exposure meter in the viewfinder was centred.
STEP 2
Set up your light. I used a large white shoot through umbrella. I chose this modifier because it will shoot light out in a fairly wide arc, basically throwing light pretty much everywhere. This means that it won't really add much directionality to the overall look of the light. In terms of positioning. I just placed it down roughly beside myself and pointed it at the subject at a little above head height.
STEP 3
Adjust your fill flash power. The easiest way to do this, in my opinion, is the to take a handheld flash meter reading, and adjust your flash power until it reads the same as your initial ambient exposure (in this case f/2.0). Of course you could just eyeball it until you're happy with the look.
STEP 4
Profit...
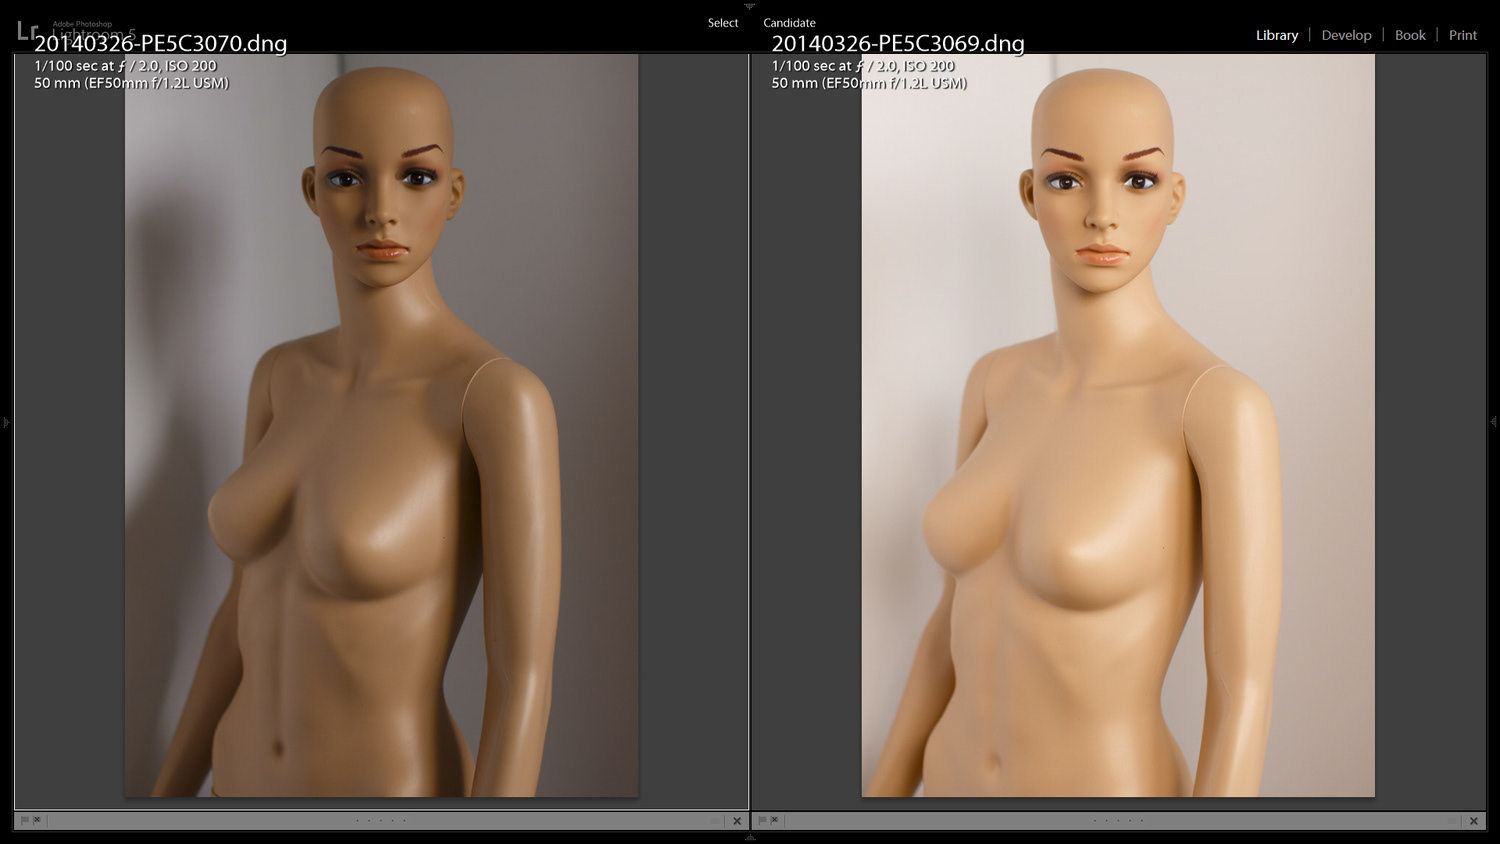
Just to prove that the camera settings for both images are identical, here's a screenshot from Lightroom with the EXIF data on display (click on the image to enlarge).
Pretty cool eh? Quite a dramatic difference for two images that are actually shot with the exact same settings. Notice how the shadows and overall look of the image are much brighter, resulting in a more natural looking light. It's most apparent with the shadow to the left side of the frame. It's almost completely vanished in the image on the right.
KEEP IN MIND
When attempting this outdoors on a less overcast or sunny day, put your subject in some open shade. This will flatten out the overall light on your subject. Then you can use fill flash to bring some life back into the eyes. This is not a technique you want to use when trying to battle blazing midday sun.
That's it. I hope you found this useful. If you have any questions or comments, you can get in touch via the Contact Page.
Cheers,
B.
B.