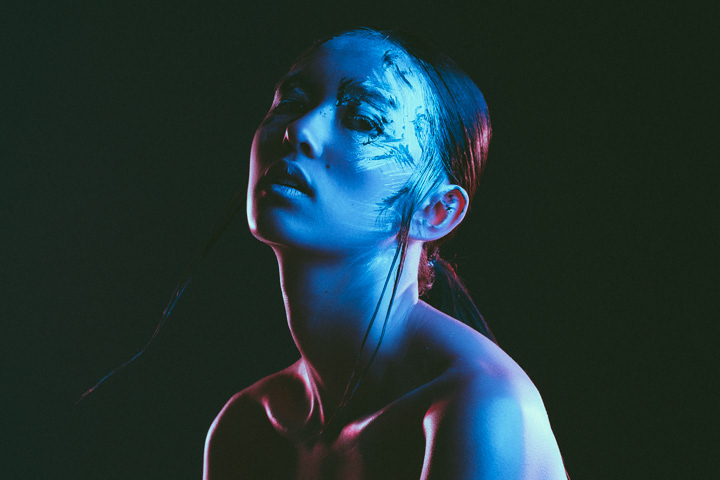
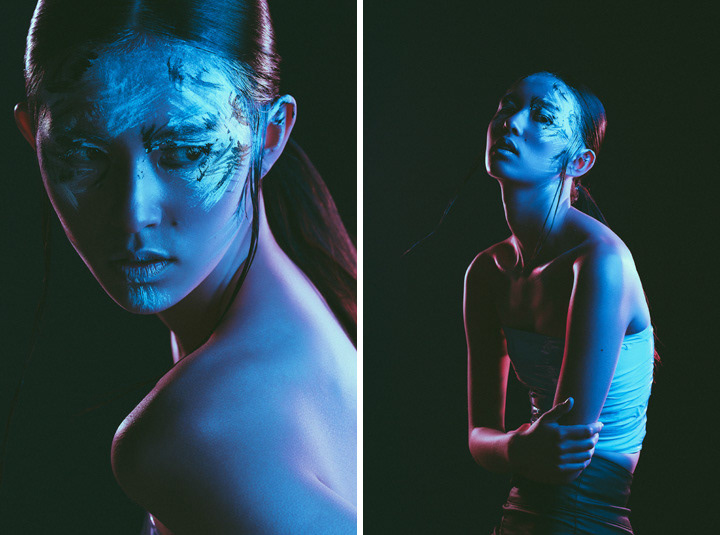
In this tutorial we will be building on the Awesome Headshot Lighting setup discussed previously, and adding some rim lights and a hint of colour via the use of colour gels to achieve a dramatic and stylish neon look.
The goal with this series was to create an edgy and yet and somehow slightly futuristic, vibrant look. So to me, that meant dark and dramatic. You can't get darker than black, so I knew I wanted a black background and plenty of shadows on our model.
MATH? NOOOOOO!!!
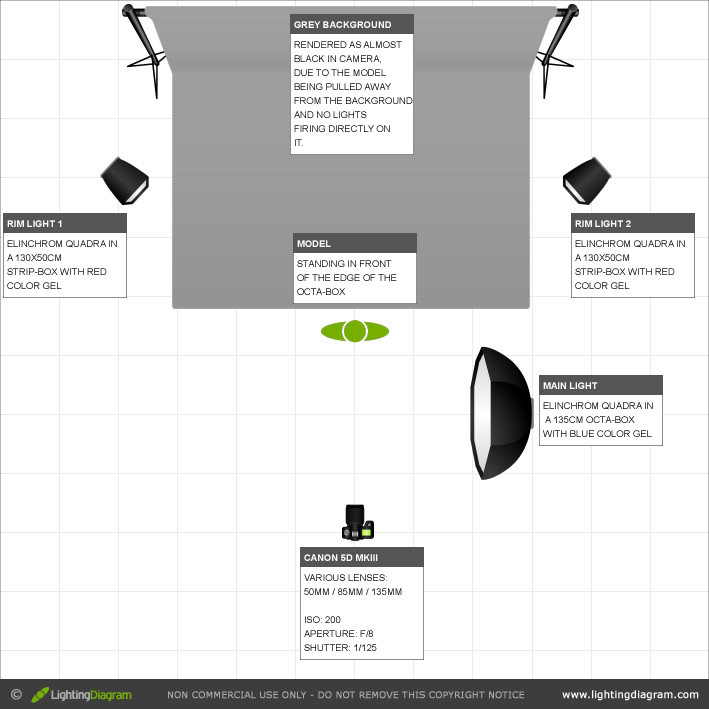
I quickly set up my go-to lighting. As you can see in the lighting diagram below, the main light is pretty much the same as my Awesome Headshot Lighting setup. The only differences are that I have moved the light a little further away from the model, and the flash is at a little over half power, as I am shooting at f/8 to retain lots of detail. I did this for two reasons:
- Firstly. I didn't want the light to be super soft. By moving the light away, it becomes smaller in relation to the subject, thus making it a little bit harder of a light source. Again, this was discussed in the previous blog post. I upped the power to compensate for moving the light further away.
- Secondly (and most confusingly). I didn't want the main light falling off into complete shadow as dramatically as my headshot image from the previous tutorial. By moving the light away from the subject you can reduce how quickly the light falls off. This is down to some crazy physics voodoo known as 'The Inverse Square Law'. Don't even bother trying to figure out all the crazy maths, it'll hurt your brain. Just be aware that the beam of light coming out of your flash decreases in exposure value the further it travels from the flash (obviously), but the further it travels the slower the exposure value decreases. This may sound confusing, but if you think of light as having a sort of depth of exposure value it might help. So, if you place someone right next to a light source and expose them properly, the light will fall off very quickly. Resulting in deep shadows on one side of the face. Now if you move that person further away from the light and expose them properly, the light on their face will be more even as it is now falling off in EV at a slower rate as it travels further away from its source.
RIM LIGHT
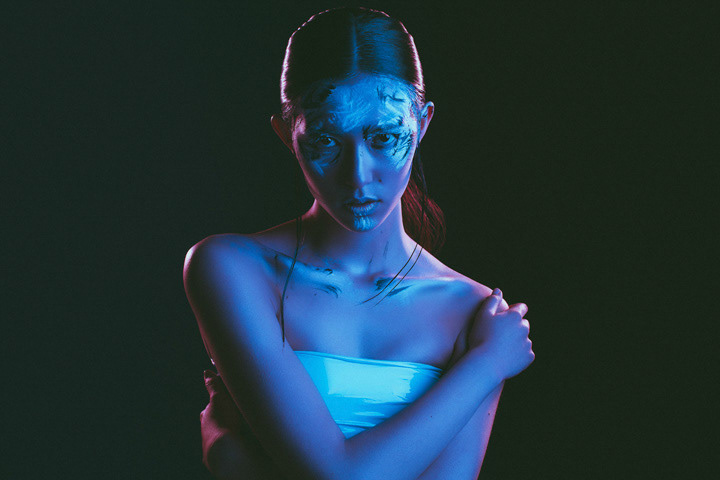
Okay, now that all of the brain-melting stuff is out of the way, we can get back to work. I knew I wanted to separate the model from the black background, and there's no better way to do that than with some rim light. What is rim light? Well, it's exactly what it says on the tin. A small rim of light coming from behind to highlight the edges of the subject.
When setting up rim lights I usually bring the lights up to about face or shoulder height on the stands, at roughly a 45-degree angle to the model. If using two rim lights, both lights should be about the same distance from the subject and firing at about the same power.
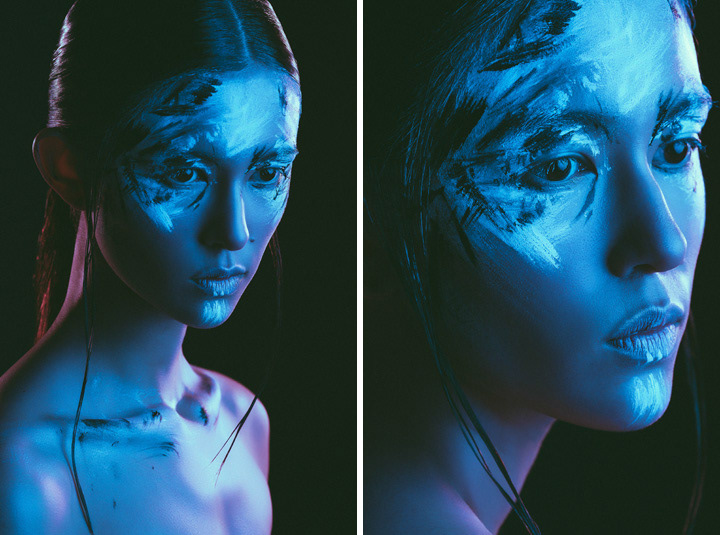
With the model looking straight ahead I then use the modelling lights on the strobes to see the exact position where the rim falls on the subject. I prefer to have it just highlighting the edges of a persons head, face and shoulders. Try not to have the rim light spilling over onto a models nose. It's not a huge deal if the light hits the nose during the shoot, as the model moves around, but it's just a personal preference of mine that the light is not hitting the nose during initial setup while the model is looking straight ahead. I do this because when I'm shooting a portrait of someone who is looking straight ahead into the camera, I only want to see the exposure from the main light on their face with the rim lights just highlighting the edges of their silhouette.
In the lighting Diagram, you may have noticed that I used two strip boxes for my rim light. I prefer to use bare strobes as a rim most of the time. But on the day, the strip boxes were already set up from a previous shoot, so I just went with it. I mixed it up a bit during the shoot, bringing the strips in close for some shots for a softer edge and then backing them off for others to give more definition. Just be aware that anytime you back the light off, you will have to up its power to compensate.
COLOUR GELS
I don't know why, but whenever I think of the future my mind always sees scenes from the classic sci-fi movie 'Blade Runner'. In particular, it's neon-drenched cityscapes. So, with neon on my mind, I dug into my small collection of colour gels and chose a deep blue and a red colour that seemed to be just on the verge of becoming a little bit pink. This combination of colours always reminds me of neon for some reason.
By the way, a colour gel is basically just a transparent sheet of coloured material. Put it in front of your light source and the beam will take on the colour of the gel. Be aware that the saturation and shade of the colour can absorb some of the light coming from your strobes. So you may need to bump up your power a little bit to compensate, depending on the gel you're using.
For this series, I started off with one blue and one red rim light. The main light had no colour. To me this just didn't have the neon look I wanted, so I soon switched to two red rim lights and a blue gel on the main light. Thankfully this worked for me this time around. However, putting a colour gel on your main light is not always a good idea, especially if it's a fairly saturated colour. People will tend to look like aliens very fast in most cases. Just be aware of what kind of look you're trying to create before you go sticking gels on all your lights just for the heck of it.
Here's a tip if you're having trouble coming up with colour gel combinations that work well together. Go to your local art store (or online store) and get yourself a cheap colour wheel (about €5) like the one below. I've found these to be a great help when dealing with creative colour matching in the studio and during post-production.
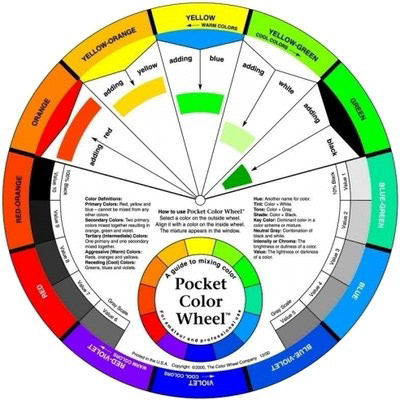
I actually have two of these. One for the studio, and one for when I'm back at home doing colour work while retouching.
Okay, I guess I'll leave it there for now. Things got a bit ropey in the middle there with all the crazy physics talk, so I wouldn't blame you if you rage quit this post. If you made it to the end, I commend your patience.
If you have any questions about rim lights or colour gels, or anything else you can get in touch via the Contact Page.
Cheers,
B.
B.