In the latest instalment of my studio lighting tutorial series, we will be attempting to fake natural light in the studio.
SOFT LIGHT
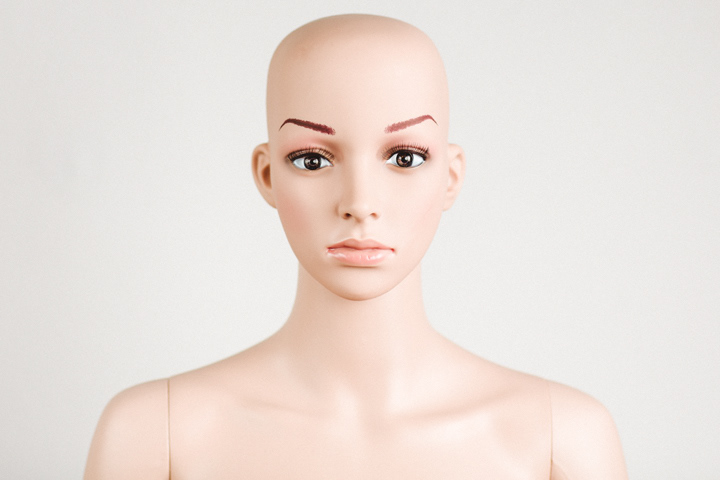
First off, let me just preface this by saying that the type of natural light we're trying to emulate here is going to be of the soft and creamy variety. Much like the quality of light one would find on a cloudy/overcast day, or if you shoot indoors next to a big window at the right time of day.
You might be thinking, why not just shoot outside, or next to a big window? Well, varying and unpredictable weather conditions are a big factor (especially in Ireland), and not everyone has access to a perfectly sized, perfectly placed window at the perfect time of day. I know I don't. My studio has west facing windows, they don't get a steady stream of useable light throughout the times I'd usually be shooting. But I love the soft, natural light look, so I've had to improvise.
There are also ways of mimicking harsh sunlight. A look that is quite popular in the fashion industry these days, but I won't be covering that in this article.
THE KEY TO FAKING NATURAL LIGHT
So, in my research of figuring out how to fake a natural light look, I basically scrutinised a lot of my favourite naturally lit images. I paid particularly close attention to the catch-lights in the eyes.
By doing this I can roughly deconstruct how big the light that is hitting the subject is and where it's coming from. One similarity I noticed in a lot of the images I studied was, that images lit by window light, and images shot outdoors on an overcast day, often had similarly shaped large catch-lights in the eyes.
With this in mind, I decided that maybe the key to faking, or at least getting close to a natural light look in the studio, was to think in terms of windows. BIG windows.
BUILDING THE LOOK
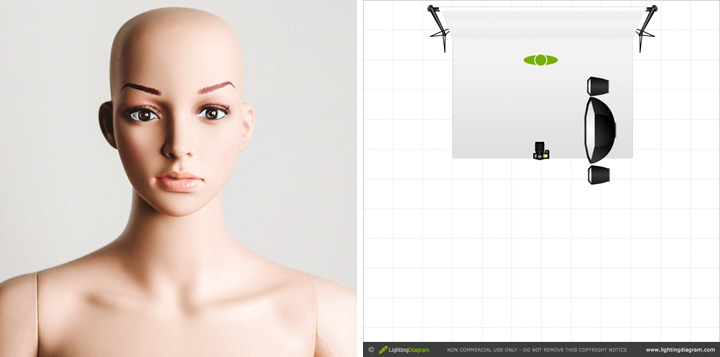
Ok, let's begin. So, I've decided to think in terms of windows. I guess the first thing I need to do is to build myself a fake window using a studio strobe light. Well, obviously a softbox of some sort would be the first port of call. But, while I do have some big ass softboxes, they don't come close to being as big the huge windows I'm trying to emulate.
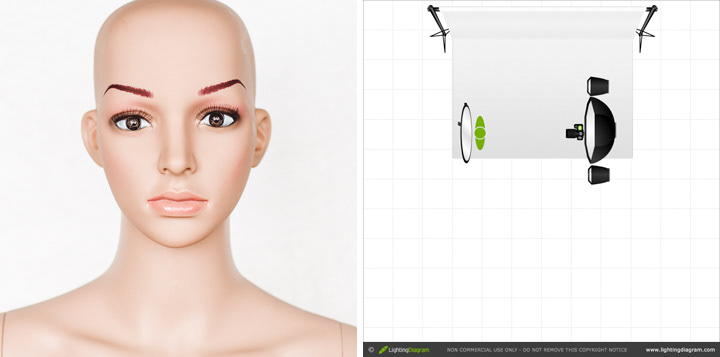
But what if I put them together? Check out the image and diagram above. That's 3 Elinchrom Quadra strobes lined up and firing through an Octa-box, sandwiched between two strip boxes. Their combined width is probably about 8 feet, and length is pushing 5 feet. That's a pretty good size for a fake window.
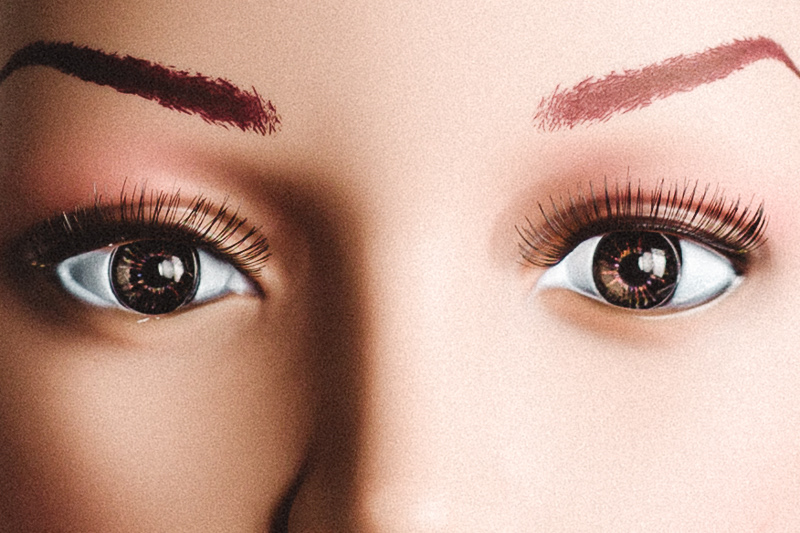
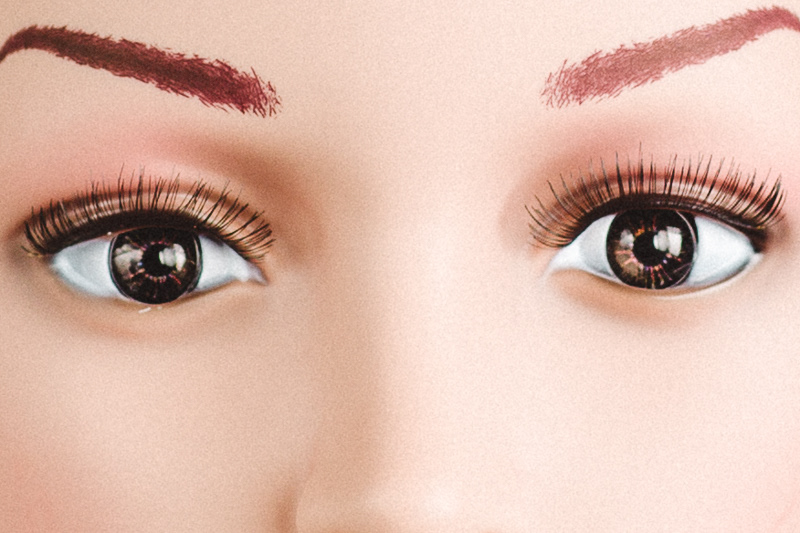
Check out the crop of just the eyes below to see how the three softboxes mimic a large, long window next to our subject.
If you've read my Awesome Headshot Lighting, Coloured Rim Light and Feathered Light tutorials, you'll notice that this is essentially a simple feathered light setup. One that I've used and talked about many times before, although this particular setup is on a slightly larger scale.
Now, while this is a really nice light, with a nice soft Rembrandt shadow pattern on the face. I want to go even softer.
FINISHING THE LOOK
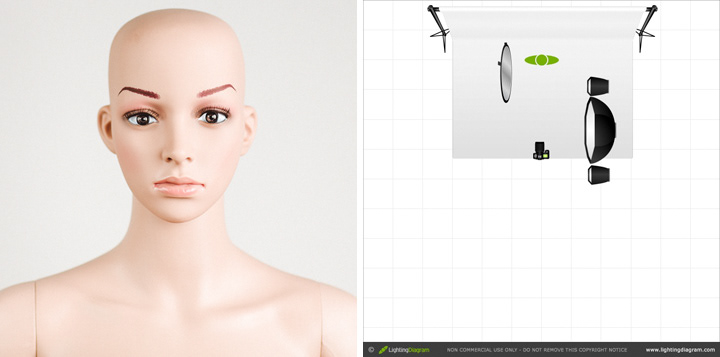
Okay, so this is actually quite easy to achieve. Check out the image and diagram above and the crop of the eyes below. As you can see, all I really did was add a big silver reflector (about 1.2 meters in size) next to the subject.
There is so much light coming from those 3 softboxes, that when you pair that with the reflective efficiency of the silver reflector on the opposite side, you're actually going to increase your exposure. I had to power my strobes down a bit after adding the reflector in order to get back to the f/2.8 aperture I wanted to shoot at.
What we have now is very soft and creamy. Almost no noticeable shadows and an overall bright, radiant look.
Does it look exactly like natural light? No, probably not. But I think it's close enough, and it is a nice looking light in its own right. It's certainly more natural looking than the average 'softbox at a 45-degree angle' setup.
TURN IT AROUND
Just for kicks I decided to mess around with this setup a little
Last year, in the building where my studio is based, there was a vacant room just down the hall. It had a long eye-level window, and the walls were painted all white, so I used to go there to shoot the odd natural light image, depending on the time of day. I really liked the look I could get in there, but alas, the room was eventually rented out to someone else, so I can't go there anymore.
Last year, in the building where my studio is based, there was a vacant room just down the hall. It had a long eye-level window, and the walls were painted all white, so I used to go there to shoot the odd natural light image, depending on the time of day. I really liked the look I could get in there, but alas, the room was eventually rented out to someone else, so I can't go there anymore.
But it struck me while I was setting up the lights for this tutorial that I could just move my subject and my shooting position to create a similar look.
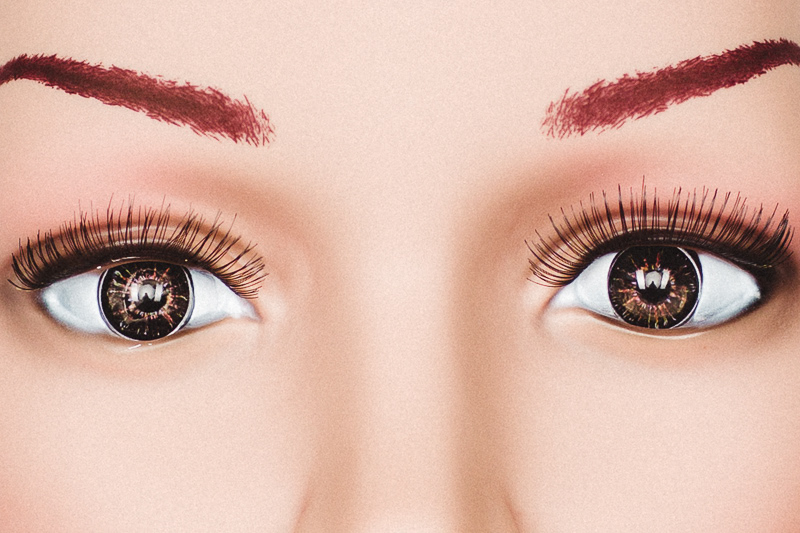
Check out the image and diagram above and the crop of the eyes below. All I did here was place the mannequin in front of the lights with a white reflector behind to act as a makeshift white background and moved my own body into the centre of the lighting setup.
I quite like the way this look pops. I think it actually looks a little better than the light I used to get in that white room. I think this would work really well as a headshot lighting setup.
I hope you found this useful in some way. If you have any questions or comments you can email me through my Contact Page.
Cheers,
B.
B.